Highlights
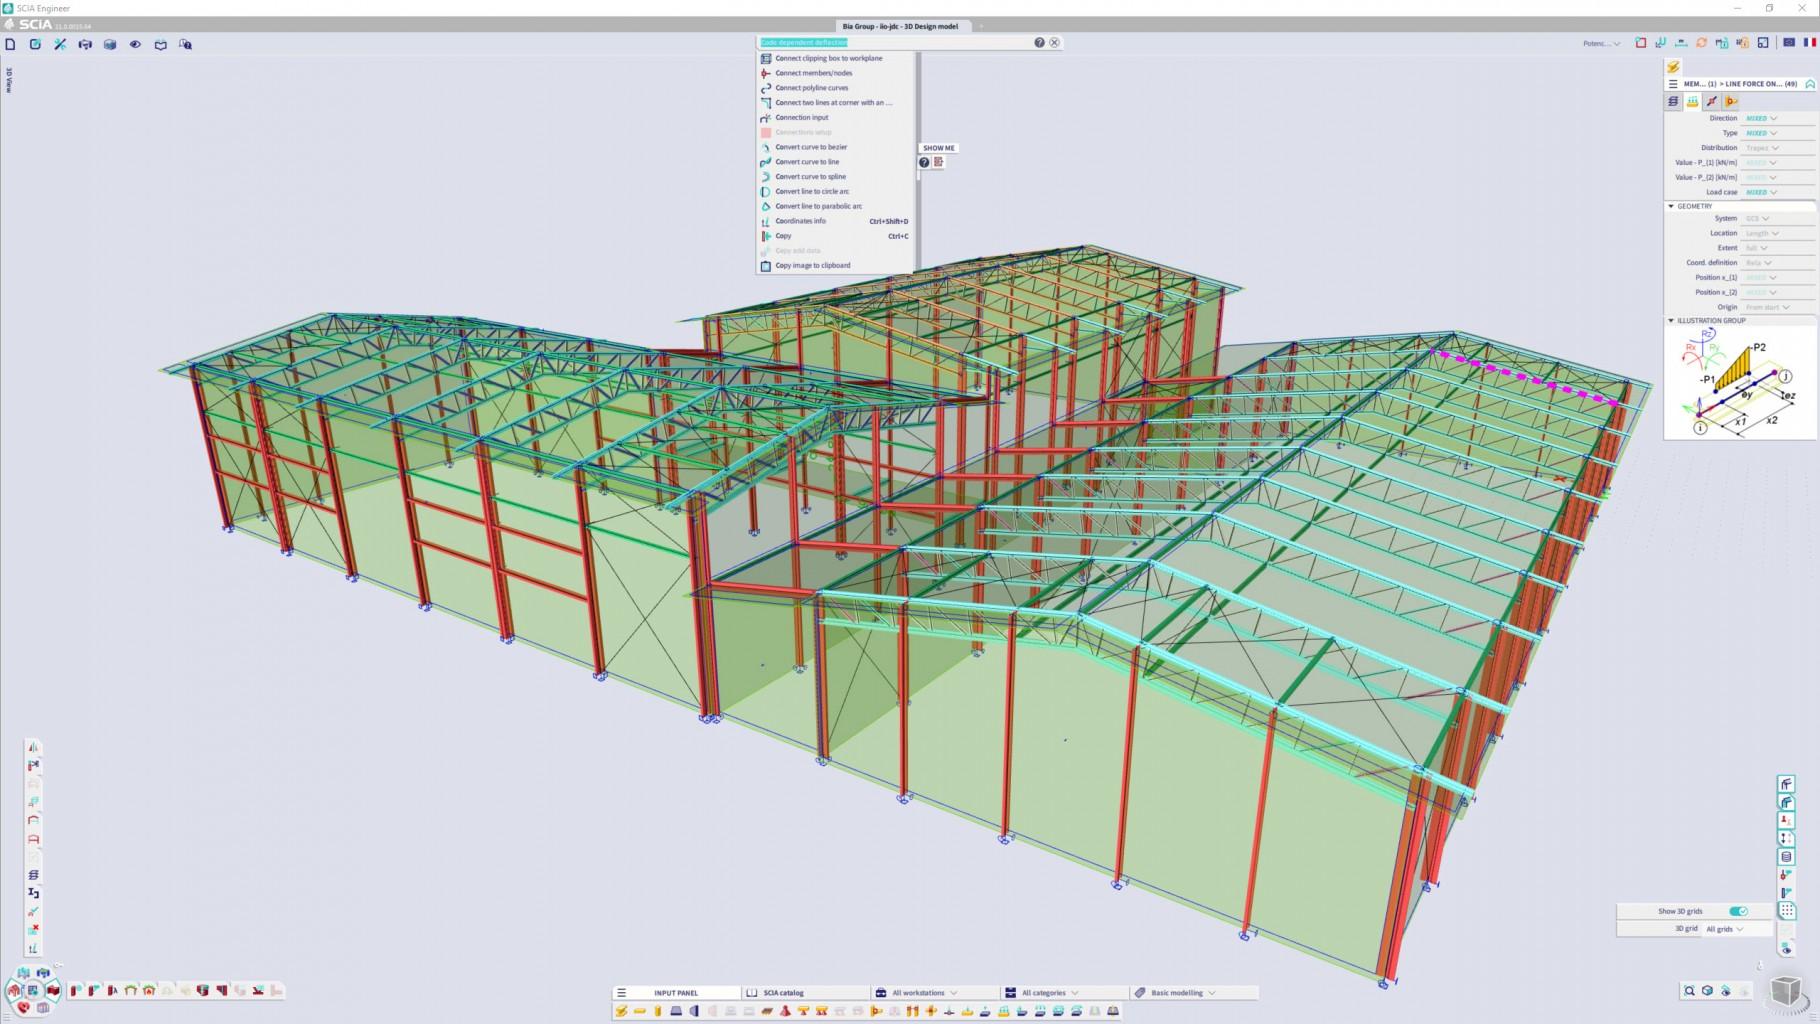
- 3D screen – place where the action happens and where the structural model is visualized
- Main menu and commands – on the fly customizations are possible – change hotkey for any command directly or drag commands to the toolbars.
- SCIA Spotlight – search, run or see details of any command. Use “Space bar” to quickly give focus to the Spotlight. Search features auto fill for quick search.
- Input panel – create all available structural entities while using simple filters based on the specific task or stage of the project.
- Process toolbar – access simply most used libraries, editing features and various postprocessing features as results and checks
- Status bar – toggle on/off different settings for efficient modelling and for viewing results.
- Properties panel – review and change properties of selected elements, use ways to quickly select by shared properties.
- View bar and Navicube – manage what is visible, volumes and rendering and settings of the camera.
User Interface of SCIA Engineer 21
The user interface of SCIA Engineer is composed by multiple separate components. Each component is unique in its way and serves different purpose. The Main menu, SCIA Spotlight and Status bar are components fixed in the top of the application and these host various functions that will be described later. Process toolbar and View bar are components with specific places in the bottom corners of the screen and these contain the most used commands to manipulate with the model, run results and checks and to adjust the view parameters. Input panel hosts features that create the structural model from all possible aspects and Property panel serves for data management and editing various properties of the structural entities already existing in the structural model. Input panel and Property panel are floating components which may be generally placed anywhere to your liking (dragging of the components is allowed on their header) or you may even minimize (just click on their header to minimize them and click on them again to show again). Automatic hide and show may be enabled for these components to maximize the working space.
3D screen
The 3D screen usually covers the biggest part of the screen. It contains the overview of the structural model and all its aspects. The general possibilities are to zoom and rotate the view, set view parameters like option to render the structure or to see volumes. Most of the actions may be carried out by mouse and the right click context menu or by using the View bar and Navicube.
The right click context menu of the 3D scene allows quick editing of the structure, displaying of properties of separate members or to send current view to Image gallery or to the Engineering report.

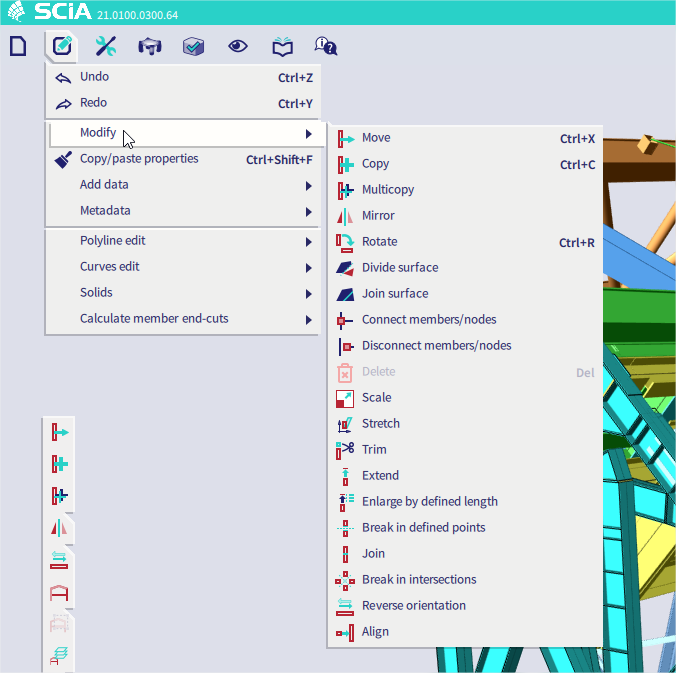
Main menu and commands
Main menu is located on the top right corner of the screen and it is organised into multiple tabs that divide the available features into categories File, Edit, Tools, Results, Design, View, Libraries and Help. From the “Help” menu you may play Onboarding and other build-in tutorials to get you more familiar and productive in the SCIA Engineer environment.
Commands may be run directly in the menu and if you want, you can drag any commands that you use often directly on any of the Toolbars. When the mouse cursor stays on top of any command in the menu for 3 seconds, a Tooltip is displayed with more information. The extended possibilities to customize cover also in-place editing of hotkeys in the right side of the lines in the menu.
Commands may have a traditional hotkey like “Ctrl+B” and in addition to that quick single letter hotkeys are allowed. You may use just “B” for Beam if that feels convenient for you. If you use hotkeys that contain “Shift”, the input dialogue of commands is skipped while running the hotkey – use “Shift+B” to run and directly input beams, you may edit them later in the Properties panel. This is the fastest way to create your structure quickly.
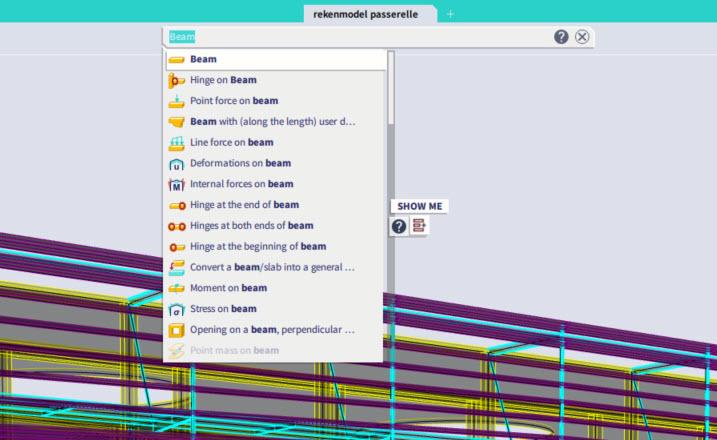
SCIA Spotlight
SCIA Spotlight is combination of search and command line. You may by any time click in it or just press Space bar to start writing. SCIA Spotlight has the following capabilities:
- Auto fill – just start typing, usually only first few letters shall be enough for you to find what you need. When command is auto filled, just hit Enter to run it.
- Anything searched may be directly accessed in the Web help by the “?” icon.
- “Show me” feature allows you to see where searched commands are in the menu, shall you need this information.
- Use SCIA Spotlight to customize your environment – same as in the menu it is possible to drag any searched command to the toolbars or to change its hotkey.
- Input coordinates while creating or editing structural objects – the easiest way is to hit Space bar before entering the coordinates or distance. The same may be used when you are using the guiding lines (available snapping possibility) This way no click in the SCIA Spotlight is necessary.
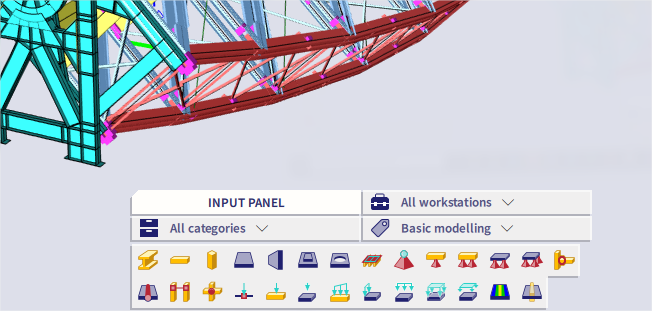
Input panel
Any object available in SCIA Engineer may be inputted via the Input panel. Because there are many different objects available in SCIA Engineer, the panel allows you to work with workstations and separate categories. This way you may start with “Structure” workstation to input the structural elements and their boundary conditions and then you may continue applying loads by using the “Load” workstation. Same as the main menu or the Spotlight, the Input panel will show a Tooltip with more information after hovering on any command for 2 seconds.
New concept are “Tags” which present an overall filter to show only the most used commands (use tags “Basic modelling” or “Quick input”) or tags may apply filter based on the modelled structure. For steel structure you may use tag “1D” and for masonry or concrete project you may use tag “2D” to filter out structural object that you do not need to use.
We allow multiple settings to allow you clear navigation of the Input panel. The options are following:
- View the panel only in icon mode or together with the name and hotkey of command (very similar to seeing commands in the main menu). If the Input panel is not wide enough to fit the icons and the names of the commands, it is by default also displayed in the icon mode.
- Show or hide the names of separate categories.
When you get familiar with the icons we created, we recommend using the Input panel in the icon mode.
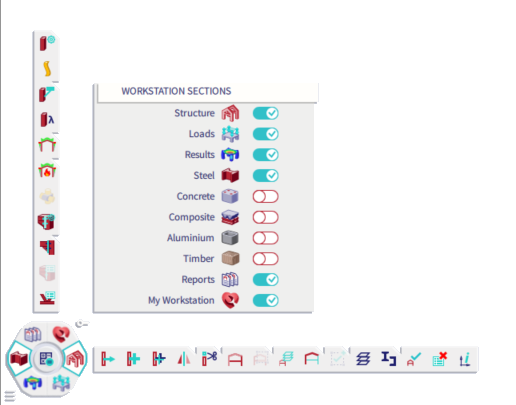
Process toolbar
Process toolbar host many commands used in various stages of the workflow of the structural engineer. Tools for editing of the structure, modifying which parts are visible or not and the most often used Libraries are in the toolbar “Structure”. Followed by toolbar “Loads” and “Results” allows you to directly create Load cases and Combinations and after the Calculation is performed, to view various Results and to use result tools, like averaging strips or Integration members. We have a toolbar available for every major material to run various available checks in workstations Steel, Concrete, Timber or Composite. Last populated toolbar is “Report” to use various tools to create output images or run and compose the Engineering report. Different workstations are shown on the wheel of the Process toolbar and they may be enabled or disabled in the Process toolbar settings.
The last toolbar is called “Custom workstation” and you may populate this toolbar in any way you prefer. In fact, the Process toolbar allows full customization – just drag any icon and drop it on new place. Icons may be also dragged on top of other icons and this way you may create “stacks”. Stacks are still represented by 1 field but may contain multiple commands. The most used command is always displayed directly in the toolbar. If you do not need some of the default commands, just drag them away to a trash can. As mentioned above, any command from Menu or SCIA Spotlight may be dragged on any location on any of the toolbars.
You may click on any segment of the wheel to activate the workstation and see the toolbar it contains. If you hold “Ctrl” and click, the second toolbar will appear. This way you may for example see at the same time Results and Checks or Structure and Load workstations.
Status bar
Status bar contains important tools some of which are useful to have visible and handy all the time. These tools are:
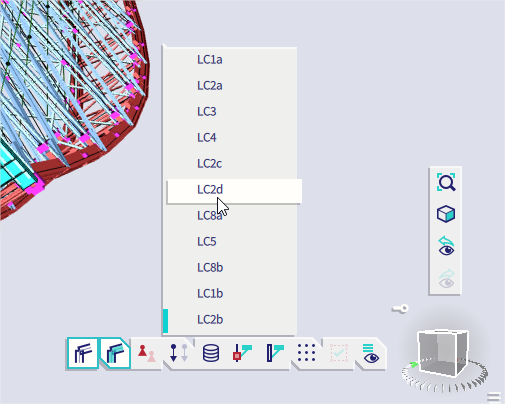
- Switching of active Load cases (mass groups or model modifier groups) – the switch allows you to browse through inputted Load cases or to create a new one. The active Load case is also automatically displayed in the 3D scene and when new load is inputted, it will be placed within the selected Load case.
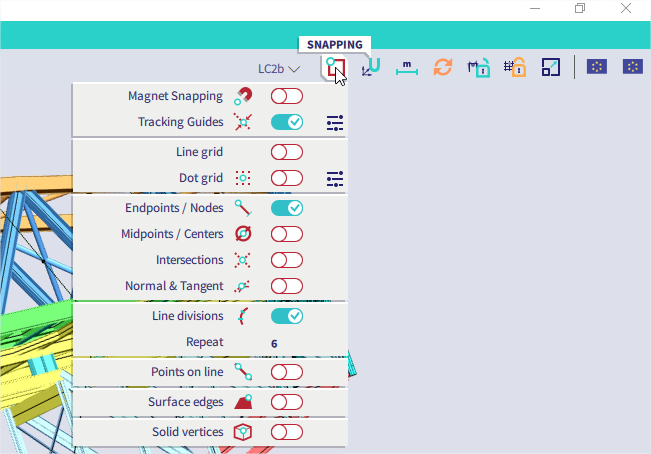
- Snapping and changes to user coordinate system are sets of commands very often used while modelling and it is with all settings accessible in the Status bar.
- Auto-refresh results – this toggle allows you not to hit refresh of results every time and it may be run automatically for you, when available.
- Result lock – results may be locked if you plan to make multiple adjustments to your structure, you do not have to run the calculation every time. Make your changes and run the calculation when you choose.
- Grid lock – editing and inputting of Grids and Structure is separated in SCIA Engineer. This mode ensures, that when your grids are set, they will be locked and may not be moved unintentionally by modelling and editing the Structure. Like this, the structure is locked, when the grids are in the edit mode.
- Scaling – basic scaling of Model data and Results for clearer output.
- Codes and national annexes.
Property panel
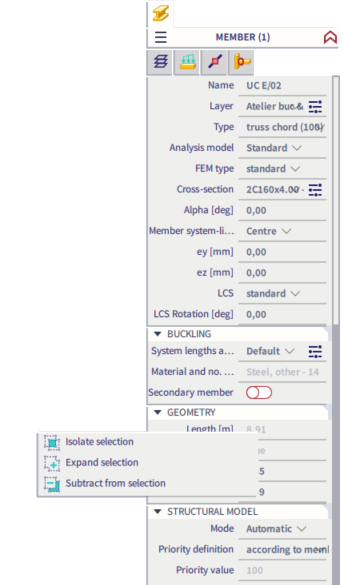
The Property panel shows contextual parameters depending on the current selection. Any time an entity is selected, its input parameters and derived properties are displayed in the Property window, where these can be reviewed or edited. In the case of 1D member, for example, a new cross-section is reassigned directly in the Properties window. Changes are immediately displayed in the graphical window. The property panel works in two modes: Basic and Advanced. The mode is toggled on the top right of the panel and allows to quickly switch between mode, when only most important properties are shown (Basic mode) and the mode when all property lines are shown (Advanced mode).
The Property panel allows to review and change properties of the selected object, but also on associated data. Associated data are all object linked with the selected entities. This way you may directly change for example the properties of hinges and supports while having the parent object selected (1D or 2D member).
Property panel may be used very efficiently to select elements based on shared property (for example all beams with certain Cross-section or length) or to quickly deselect object of certain type. Just a single right mouse click on the header or right click on separate properties displays the context menu, that allows full manipulations with any selection. To deselect, just click on “subtract from selection” or simply drag the unwanted objects out to deselect them.
View bar and Navicube
The Navicube allows basic navigation in the 3D scene in a familiar and intuitive way. Just click on a plane of the Navicube to align a model or to move or rotate the model. For efficiency, the moving and rotation may be done also by the mouse (see “Global UI settings” dialogue for more information).
View bar contains the most used toggles to change the aspects of the visible structure in the 3D scene. You may enable or disable the rendering, drawing of volumetric model, drawing of labels of nodes and elements and additionally to display or hide additional model data such as supports or loads. It also enables you to enter the window where all the view parameters may be edited.

Want to try SCIA Engineer yourself?
Explore how our software and services can help you optimise your work and boost your productivity. Try it for yourself with a free 30-day software trial.
Download a free 30-days full trial