Add a cross-section to the profile library
This FAQ explains how to add own cross-sections to the existing profile library.
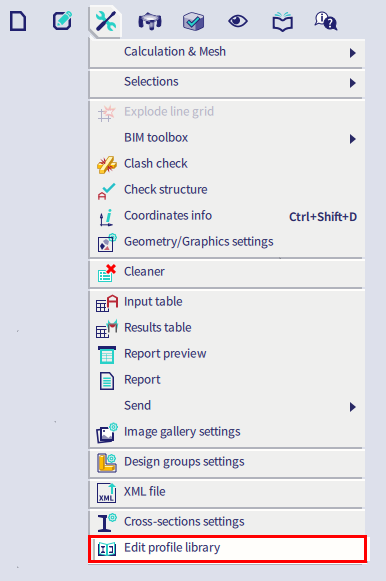
Go to Main menu > Tools > Edit profile library:
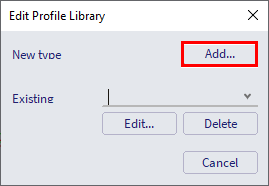
Select Add so to add a new cross-section to the profile library:
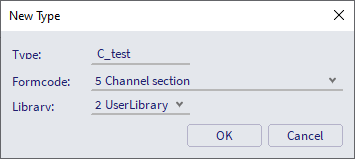
At this point you should specify:
- A Type, to identify the cross-section in the profile library (in the example below 'C_test')
- A Formcode, so to associate the section to a shape (in the example below, a 'C' section)
Then, press OK.
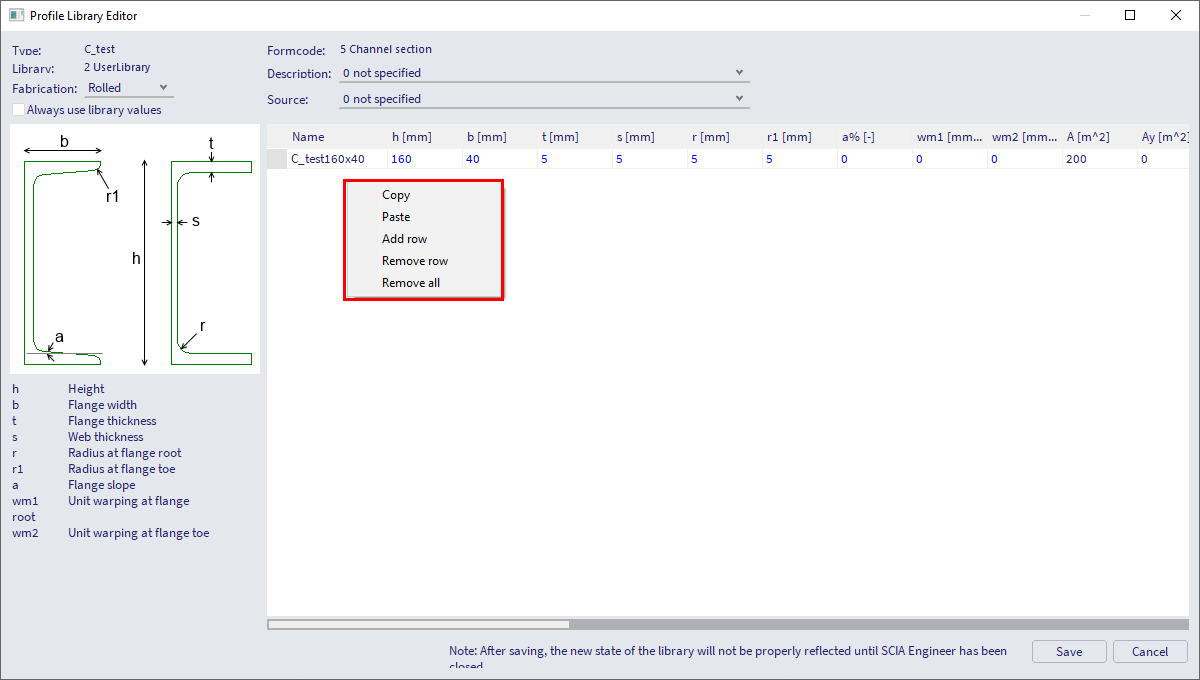
You can now input the cross-section fabrication type, geometry characteristics and name.
Two rules should be respected to save the cross-section:
- The value of A, Iy and Iz cannot be left equal to zero: a value should be input for these parameters even if they will be automatically recomputed based on the geometrical dimensions.
- The name should be composed by the type name (in the example ‘C_test'), followed by a number (in the example 160x40).
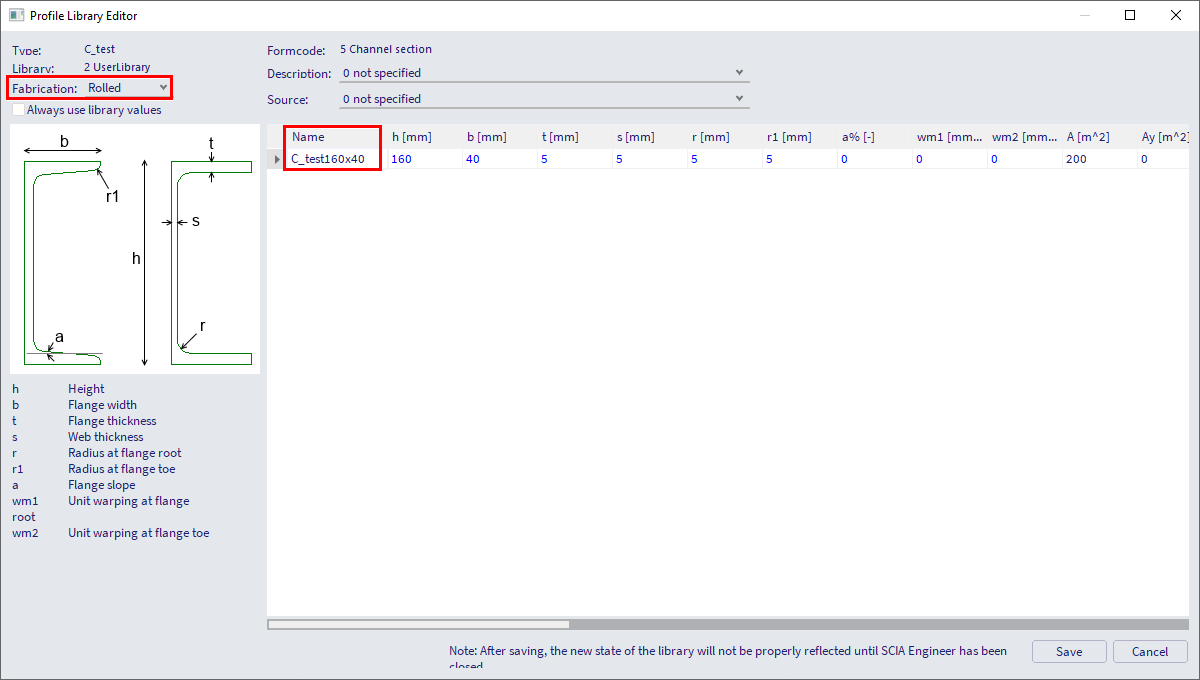
If needed, right-clicking in the window give the possibility to add more rows to the table, so to add more cross sections associated to the given type name ('C_test') and Formcode.
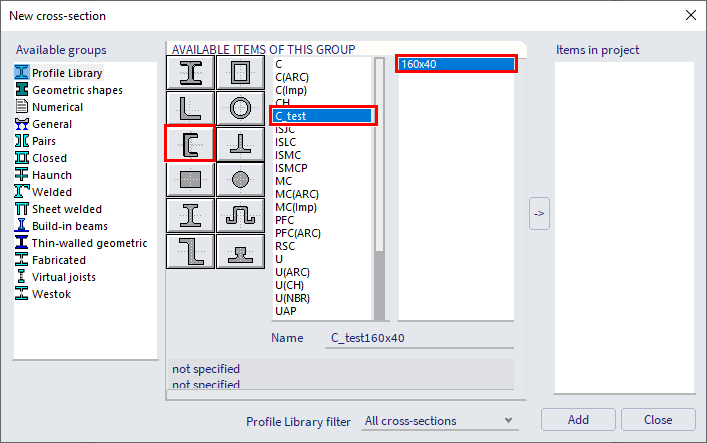
Once saved, the newly added cross-sections are available in the profile library (Main menu > Libraries > Cross-sections) by selecting the appropriate shape, type, and cross-section name:
Note: in the figure below all the characteristics have been recomputed based on the input geometry:

Note: the user created cross-section can also be used for paired cross-sections.